Whole Brain Teaching: The Scoreboard

**This is a repost of my initial Scoreboard blog post. I am reposting it now with some end-of-year reflections and how I tweaked certain parts to work in my class. I would love to hear how you use this in your own class in the comments below!

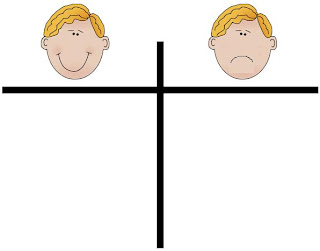
Every day in class we keep a scoreboard of how many "Yes" and "Groan" points we get. It is paired with the "Class-Yes" technique and actually provides us with a chance to work together as a class multiple times a day.

Every time I finish with our "Class-Yes" I look and listen to see how the students did with the expectations. Are they looking at me? Are voices off and have hands stopped working? If so, I quietly say, "Yessss!" and make a tally under the smiley face. Kids say the "Yesssss!" with me, and then I continue with my teaching message.

If, on the other hand, I notice talking, movement, or that several students have not done the "Class-Yes" then I drop my shoulders and moan while I make a tally under the frown face. Kids make the moan with me and then I continue with the lesson.
My class Scoreboards- you will notice two scoreboards- in our school, we switch kids up for math class, so their tallies are for the whole week and result in an extra minute of free choice, computer lab, game time, etc.
A few important things to remember:
  1. I want the kids to make the Yes and Moan noises with me- it refocuses us as a class
  2. I remind the kids that a frown face point is not the end of the world, it just encourages us to do better next time.
  3. I make the Yes and the Moan QUICK! They should not stop the momentum of our lesson and instead should keep up moving forward as a class.
  4. I do NOT give out a frown face point for the actions of one student. In that case, I would ask him/her to "Clip Down"
  5. I keep the ratio 3:1 or closer- I want the closeness to keep us in suspense!
  6. On the Whole Brain Teaching Website, there is a fantastic video all about the Scoreboard- I encourage you to watch it because it delves VERY deep into all of the possibilities!
At the end of the day, after we have packed our bags and stacked our chairs, we take a look at the scoreboard as a class to see how we did. If we have more smiles than frowns, I will give a small reward. This year, I went through a few options:
  • An extra minute of recess the next day
  • A sticker on their way out
  • A super-fun and active Brain Break, like Air Band or Dance Off!

After doing this for the year, I have a few reflections on how things worked and how I had to change them up to work for me:
  • The extra minute of recess the next day was a no-go for me. It was a weird reward since the Scoreboard resets each day, so celebrating the day after just wasn't so fun for my kids. 
  • My kids LOVED stickers this year, even as third graders. This was an easy reward for me, since I have tons, buuuuut....
  • The best reward EVER was one of our active and crazy Brain Breaks, like Air Band or Dance Off! All it would take from me was putting on a song and having the kids choose an "air instrument" to play or making sure they had enough room to boogie down :)
  • Using the Brain Breaks helped what I consider to be one of the biggest pluses of WBT- momentum and the sense of urgency about our learning. Brain Breaks were an energy and morale booster and everyone willingly took part. Plus, it got us giggling at the end of the day, and nothing is better than sending your students out the door with a smile on their face
I also experimented with having to get a certain number of tallies to get a reward, but that put more work on me to make sure that  I was giving them enough chances to get to that number. Needless to say, that didn't last long!

One thing I need to keep working on is the quickness and the seamlessness of the Yes and Moan into the lesson. I am definitely guilty of stopping the lesson to remind them to do better if we get a moan, blah, blah, blah and I REALLY worked hard to stop that extra chatter and keep the lesson moving along.

This got better as the year progressed, and having something fun to work towards for the kids helped the best.

On the WBT website, Coach B talks about variations of the scoreboard, such as students vs. teachers, boys vs. girls, left vs. right side of the room, and more. There are so many possibilities and the end result is that kids are having fun and (hopefully) enjoying a really fun, simple reward for being fully engaged in the lesson and the school day.

Do you use the Scoreboard in your class? What do you do as a reward? Leave me a comment below :)


Class? Yes! and Hands & Eyes

*This is a repost of one of my first WBT posts. I am reposting it now to add some context to the new Whole Brain Teaching posters in my TpT Store, and also to add some additional information that has helped me through this year :) Enjoy!

One of the very first things I tried from Whole Brain Teaching's strategies, and the easiest to implement was "Class-Yes". 

The premise is simple: the teacher says, "Class?" and the students respond, "Yes!". When they say "Yes!" they also need to stop whatever they are doing and give me their undivided attention.

I begin this in a very similar way that WBT Inventor, Chris Biffle, does:

However the teacher says "Class" is how the students respond. This is where the creativity and fun come in. Here are some of my favorites:
  • high-pitched voice
  • low voice and slooooow
  • repeat class twice or three times
  • "Classity Class" (response: "Yessity Yes")
  • "Classadoddle Doo" (response: "Yesadoodle Doo")
  • songs: Frere Jacques works well (I had one of my girls come up and say that she loved when I sung lullabies the best!)
  • "Oh Class" (response: "Oh Yes")
  • whispering
  • loud!
It typically takes us two to three times to get everyone together. We then record how well we did on the scoreboard that he also mentions in the video.

If a particularly important concept is coming up, after "Class-Yes" I will ask for "Hands and Eyes" and clasp my hands together. The students will repeat, "Hands and Eyes" and clasp their hands, stop what they are doing and look directly at me, giving me their undivided attention.
I was taken aback about 1. how quickly they caught on and 2. how much FUN we were all having-- there were times after "Class-Yes" we were all giggling a bit :)

Find these posters and a whole bunch more in my TpT Store HERE!


Whole Brain Teaching Posters with Clip Art

**UPDATE: These are back for FREE in my TpT Store :)

I have made a second set of the Whole Brain Teaching Posters- these include clip art and have different color fonts. They would be perfect for a primary classroom, or any classroom implementing Whole Brain Teaching :)

These posters include the five most common Whole Brain Teaching sayings:
  • Class? Yes!
  • Teach. Okay!
  • Mirror
  • Yes! No Way!!
  • Hands & Eyes
  • Switch!
The clip art is from Scrappin' Doodles and I think they have the cutest designs, don't you!?

Snazzy chevron more your style? No worries! That's available, too :)

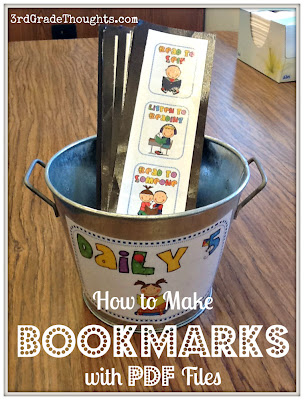
Tech Tutorial: How to Make Bookmarks Using PDF Files

I have received so many requests about my Daily 5 Bookmarks that I wanted to share the tutorial with you today in case you wanted to use this for your own class.

My finished Daily 5 bookmarks looked like this:

They were super easy to make and with construction paper backing and laminating, they made it through the year (relatively) unharmed!

Next year, I am going to redo them using my own Daily 5 Signs. These are available in my TpT Store in a HUGE assortment of colors. This tutorial is going to take you through the plain bookmarks, but you could use any color and even mix-and-match them if each center were to be its own color (ex: Word Work is red and supplies are found in a red tub, Teacher Time is purple and you store your items in a purple tub and folder, etc.)

To begin, you will need a pdf file with each slide being one full picture (it will get shrunk down, so make sure it is large enough!) and a printer already installed in your computer. My screen shots are taken from my PC, but the directions are super-similar for a Mac.

First, from the pdf, go to File-- Print.

The screen will then pop up, looking something like this:
Click to enlarge
First, click the "Multiple" button because we will want to print multiple pages on one sheet:
Click to enlarge
This will automatically show 4 pages on one sheet- 2 across and 2 down. We want to make a bookmark, so we need to adjust the "Custom" settings to 1 across and 5 down:
Click to enlarge
The nice part is the preview pane on the right- it will automatically update itself with the selections you make. If it ever seems to be taking a while and/or not updating, click the slider beneath the picture and it will update.
Click to enlarge
Ok, now you have 5 pages shrunk down to the size of a bookmark, but the pages are not the ones you want to use- here's where the page numbers are very handy and where the different rotations come into play.

First, pick the pages you want to rotate through. For my example, using the plain signs, I want kids to rotate through pages 59-63 (Read to Self through Work on Writing). I am going to type those pages into the "Pages" section, separated by commas:
Click to enlarge
Change the quantity to the number of copies you want- I always make extra since these get lost in desks or around the room, so I recommend making a few more than you need. Then, click "Print" and get ready to make your second set.

For the second rotation, I simply delete the first page number (in this case, 59) and then add it to the end of the list of pages, separated by a comma:
Click to enlarge
If you click on the above image to enlarge it, you will see my pages to print are now "60,61,62,63,59" and that "Read to Self" went from the top to the bottom of the bookmark and the rest of the choices got bumped up by one.

Now, print off the quantity needed and get ready to print Rotation #3.

For this rotation, I am going to do the exact same thing as before, but this time bring 60 to the end, so that my pages to print will read "61,62,63,59,60":
Click to enlarge
This exact same strategy continues until you are back to the original order.

Now, all you need to do is cut each bookmark out (VERY easy to do with a paper cutter since they all have the same margins!), mount them on construction paper, and laminate them. You could also print them out onto cardstock and laminate them.

I have used this printing strategy for several other pdf's in my collection- this way kids get to see each poster in a compact, easy to use size and it makes it a breeze for me to pass them out and collect them!

I hope you enjoyed this little tutorial and that you now have loads of bookmarks on your to-do list :)


Daily 5 Posters with Chevron Backgrounds

Don't you just love it when everything matches?

I had way too much fun making my Whole Brain Teaching signs the other night and decided to continue with the chevron theme and wide variety of colors to make another set of signs that are a necessity in my classroom: Daily 5 Choices!

Yay!

These signs include:
  • Daily 5 Title Page
  • Read to Self
  • Read With Someone
  • Listen to Reading
  • Word Work
  • Work on Writing
  • Teacher Time
  • A blank sign
They come with the chevron background in a huge assortment of colors:
  • teal (my fav!)
  • orange
  • blue
  • gray
  • red
  • purple
  • green 
and the last set of signs has no background in case you would rather print them on color paper... up to you!

These will look fabulous in your room and with the variety of colors, you can use just one or mix-and-match. Think of how easy organizing Daily 5 Choices would be if everything associated with Word Work was red and you used the red background? Then, Teacher Time could be purple and your tub could have the matching color.... the possibilities are endless :)

Enjoy these fun poster sets! Pick them up now in my TpT Store :)

Whole Brain Teaching Classroom Signs

My newest item to my TpT Store are signs for your Whole Brain Teaching Classroom.


I am super-excited about these because I pretty much love everything about Whole Brain Teaching and I am currently obsessed with the chevron print :)

I had a similar set of signs hanging in my classroom this year and it was a nice reminder of the sayings that we used and helped my visual learners a lot. WBT incorporates a lot of kinesthetic and auditory learning, but it's important to remember the visual kiddos as well!  

This HUGE pdf file has the WBT lingo on four cute signs in loads of colors. The signs say:
  • Class? Yes!
  • Hands & Eyes
  • Teach! Okay!
  • Yes! No Way!! 
  • Mirror
  • Switch
  • A blank page for your own WBT favorites :)
They come with the chevron background in:
  • teal (my fav!)
  • orange
  • blue
  • gray
  • red
  • purple
  • green 
and the last set of signs has no background in case you would rather print them on color paper... up to you!

Enjoy and I hope these will inspire you to not only try WBT in your class, but also get excited about decorating for next year (I am so excited and this year isn't even done yet!).

Want a set of these signs for free? Leave a comment telling me how you use or plan to use WBT in your class and I will choose a winner on Wednesday!

**UPDATE: Congrats to Sandra from Sweet Times in First! Check your email because you won :)
 

Word Work: Scrabble Tile Spelling

Here is another option during our class' Daily 5 Word Work: Scrabble Tile Spelling.


Students use Scrabble letter tiles to spell and add up their word's point value.

One thing I noticed was that letter tiles are VERY expensive! They are popular for crafts, so therefore their price is pretty steep for a D5 center item (for me).

You have a few options:
    • a classroom/schoolwide all-call for extra tiles
    • garage sales 
    • thrift stores 
    • create your own by printing out the letter tiles pdf on cardstock (3 A-Z sets are included in the Scrabble Tile Packet in my TpT Store)
    • Protiles- an AMAZING company that LOVES working with teachers

I went through Protiles and got the amazing sets that are pictured above- four of them at a discounted teacher price- yay! I barely have time to do laundry, so rummaging through our city's thrift stores and/or garage sales was not on the agenda. I was happy to pay and received some top-quality tiles in complete sets :)

When kids use any of these tiles to build their words, I have them record their answers on the Scrabble Tile Worksheet:
I printed out several of these on cardstock and laminated them so students can use a white board marker to show their work and simply erase it when they have shown me- super easy and less waste!

I love this center for similar reasons to Word Worth- it is so great to have kids practice their spelling and necessary math skills all at the same time! Plus, the addends are all small in this activity, so it's a great way to practice mental math, adding more than 3 addends, counting on, and more!

Interested in the Scrabble Tile Worksheet and 3 pages of A-Z letters to make your own tiles?
Download it all from my TpT Store HERE.


Transition Time: Word of the Day

I cannot believe I haven't blogged about this before, but even if I have, here's a fun refresher & freebie :)


I have a rowdy bunch this year, so a lot of my teaching involves movement, Brain Breaks and Whole Brain Teaching strategies.

One thing that rates at the top of my pet peeves is when kids start to transition the second I start giving the directions. It turns into a scene of me yelling over a group of moving kids who, of course, end up asking me what to do 2 minutes later.... grr!

Enter Ms. Noonan, from Teaching Channel, and her great video about managing transitions using the Word of the Day.


I love so many things about this video, don't you?!
Rewatch it, you will find something new every time :)

Every day, I end our Morning Meeting by introducing the Word of the Day. This word can come from our content units, character ed training, a new vocab word from Teacher Time, anything!

Some recent examples include:
  • schooner when we started our Westward Expansion unit
  • herbivore when we researched our Colorado Animals 
  • profit when we began our economics unit
  • compromise when our day included making decisions as a group
I will intro the word using the "I say, you say" she highlights in the video above, then write it on the board and have a child define it aloud to the group. I will add on to his/her definition and provide a few examples. The word stays written on our board all day (and sometimes it's the Word of the Day for two days in a row if it's a really fantastic one!).

Then, whenever it is time to transition and begin a new task, I begin all directions by saying, "When I say the Word of the Day..."

This has worked out so incredibly well this year and it has also increased by students' vocabularies! During Birthday Circle today, one student's compliment to the Birthday Boy was, "You are always willing to find a compromise," and I knew it was because that had been our WOTD late last week :)


Interested in my Word of the Day poster? Pick up your free copy HERE.


Word Work: Word Worth

**Update** This was featured on The 2 Sister's TheDailyCafe.com Newsletter on July 6, 2012!

I have several options for my Daily 5 Word Work where kids can choose activities to practice their independent words.

One of the stations I like best is How Much is Your Word Worth?
This is a fantastic way to combine math and spelling!

I have assigned each coin a value and students need to figure out how much their spelling word is worth. There are some additional questions on the bottom to determine which word is worth the most, least or the same.

I print these out on cardstock and laminate them. I also pair it with play money for my more tactile kids who need to manipulate the money to make a pile for their word.

It has been wonderful to see kids have this repeated practice with money throughout the year!

Interested in Word Worth? Check it out in my TpT Store!


Animal Research Publishing Party

**UPDATE** I have uploaded all of my materials in a zip file on Google Docs for FREE! Find them all HERE.

We just threw a HUGE Publishing Party in my room a few days ago that celebrated my students' Colorado Animal Research Projects. It was fantastic!
Each child chose a Colorado animal to study and published their research findings into a foldable. Topics included: description, habitat, diet, interesting facts, and a topic of their choice. Some chose predators/prey, others chose what to do if you see the animal in the wild, and others did the different types of their animals both in Colorado and around the world.

We worked on publishing their work in class into their foldable and at home, they were responsible for their physical representation- this could be a poster, diorama, model.... anything that showed their animal in its natural habitat.

Click on the photo to download your own copy on Google Docs!
We created a class rubric together so that it could serve as a guide to kids throughout the process. We made goals and it made conferring with each student very easy. It was great for them to use the rubric as they worked to check to make sure they were on the right path. I also sent a copy home to parents to they knew expectations for the physical representation, as well as what their child was working on at school.

Finally, the big day arrived! Kids brought in their projects and they were proudly displayed on their desks, along with their foldable.

I made a handout inspired by this pin:

...and added their name and animal to the inside.

I stayed near the door and passed these out to parents as they entered our reorganized classroom, with desks in a large U so that visitors could wander to anyone's desk and ask questions.

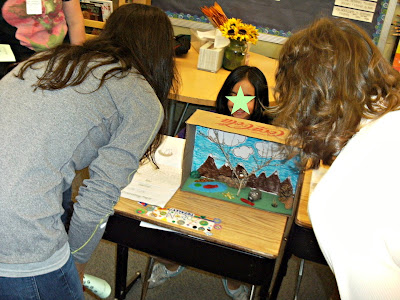
Here are a few of my students showing off their hard work:
I really loved how the open-ended project resulted in each child's representation being different! It was ah-ma-zing to see their hard work come together in such a fantastic way!

Do you celebrate Publishing Parties in your room? I'd love to hear about how you celebrate the end of huge writing units in your class :)


Assess Yourself: Formative Assessment Posters

**UPDATE: Want to make these into a bookmark for a student desk reference? Click the photo below to be taken to a tutorial** 

Do any of you use Everyday Math as your math curriculum? I piloted it this year in my building and I really liked it- our old math curriculum was pretty archaic and I love how EM makes kids much more nimble with numbers!

I especially loved how they set up their assessments. At the beginning of each, there is a self-assessment and I actually make several copies of this to use throughout the unit. We will fill one out at the beginning and then touch base with it after lessons that cover one of the major topics listed.

I was making some posters of these great doodles when I came across Alison's blog, Eberopolis. She has a great anchor chart posted and I loved the titles she gave to each of the levels:

These titles were the missing pieces that I needed to help make it all come together! Plus, I liked her "Novice" category- at the beginning of some units, students have never heard of the concept, so it was very fitting.

I decided to make some posters to hang in the classroom and extend this concept past math class. Here's the result:

I am really liking this new format and hope you do, too! Want to get your own copy? Click the image above or HERE to get yours for free!