

As a teacher, time is always at a premium! There are always so many things to do, lists to check off, and ideas swirling around in our brains.
Over the years, several of you have reached out to me and mentioned that assembling Brain Breaks was tough, especially if you don't have a circle punch. I totally get it! I created a how-to to make assembly easier, and you can find that HERE.
That being said, there's an even *easier* way to create these little Brain Breaks, although it will take the Poster PDF version of my packet and look slightly different. The good news is that you can use a paper cutter and get these guys up and running quickly! Plus, this packet includes the posters and PowerPoint versions, so you end up with several options for these in your classrooms.
That being said, there's an even *easier* way to create these little Brain Breaks, although it will take the Poster PDF version of my packet and look slightly different. The good news is that you can use a paper cutter and get these guys up and running quickly! Plus, this packet includes the posters and PowerPoint versions, so you end up with several options for these in your classrooms.

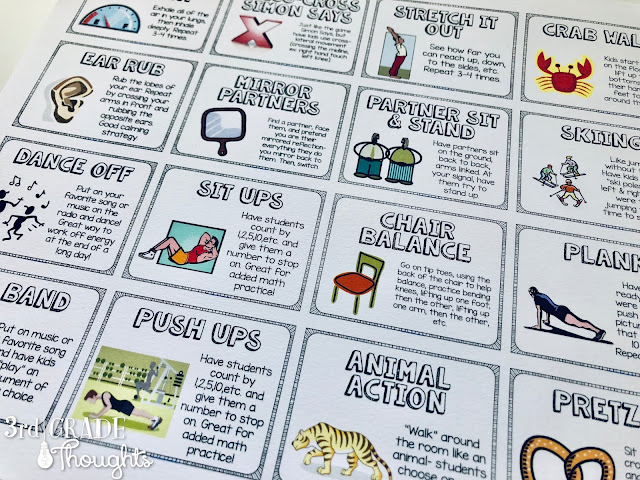
The picture and title are on the front and the description is on the back. I mount them on paper and laminate them to make them extra-sturdy and I know from personal experience that they last for years and years!

These are smaller versions of the poster, so they are one-sided and include the title, picture, and description all on one side. You can easily laminate these and hot glue them to a popsicle stick in no time flat. They offer all of the same information, just in a more compact form.
Interested in creating these? Here's a simple step-by-step guide to help.
What you will need:
- Brain Breaks PDF & PowerPoint from TpT HERE
- Cardstock (optional, but highly recommended)
- Printer
- Laminator
- Scissors or paper cutter
- Popsicle sticks
- Hot glue
The first thing you will need to do is open the PDF of the Poster Brain Breaks and get ready to print. I recommend full-color on cardstock for added durability.
On your print screen, be sure to make the following adjustments:
- Click "Multiple"
- Change the "Pages per sheet" to 16
- Be sure it is in "Landscape" Orientation
- Print on one side only
- Do not print page borders
- Optional: You can adjust the pages that will print to take out the cover, directions, credit pages, etc.
I have made a short walkthrough video here to help:
There is also a post HERE that can help as well. You can make these larger by only printing 2, 4 or 9 per page. Nine per page may be a good choice for younger grades, especially if you have a "Brain Breaks Leader" as a part of your Classroom Jobs-- the text is slightly larger to help. The examples are all done with 16 per page, which is the size I found to be the most convenient.
After these have printed, you can laminate them right away.
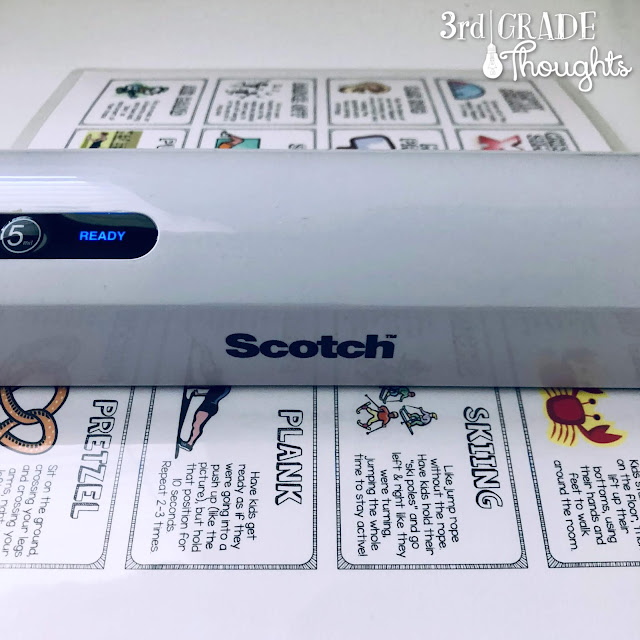
I cannot cut a straight line to save my life, so I get out my handy-dandy paper cutter to trim off the borders, then just cut these Brain Breaks by rows and columns.

Start heating up the glue gun and get your popsicle sticks or tongue depressors ready.
I have heard of a few ideas when it comes to assembling:
- Glue one Brain Break onto each popsicle stick
- Pair these breaks up-- glue one "energizing" break on one side and one "calming" break on the other
- Different popsicle stick colors can be used to differentiate the types of breaks: energizing, calming, partnerships, etc.

I hope that you can use these tips to create Brain Breaks for your classroom. If you have been on the fence about adding these to your classroom repertoire because of the assembly required, don't let that be a factor anymore-- you can get these done in one evening and be ready to share them with your students tomorrow!
Happy Brain Breaking!

No comments
Post a Comment