More Chevron Decor for Your Classroom

It's crazy to think that kids are going to be arriving in class in just a few weeks!!

I have been puttering around in my classroom all summer, but it's starting to feel a bit more urgent-- the piles on my tables need to start getting organized, not just moved around to a new pile ;)

As you know, I am loving chevron and have been incorporating it quite a bit in my classroom. I have added these items to my TpT Store and hope you can use them, too :)

Clock Numbers & Numbers 1-30:


Do you number your kids? I have and it helps so so so much with organization! I use their names as well, so at the top of their papers they need to write their name and number, but this strategy has saved me so much time! I can easily find who hasn't turned something in, it's easy to alphabetize the kids' work, and when we are on a field trip or fire drill, I have them number off quickly and we know if we are all accounted for.

In the picture, I am using the numbers on the back wall, so when kids take their bins to work around the room, they know where to return them. It's a lot "cleaner" looking than their names all over the place :)

In this packet are numbers 1-30 in each of the chevron backgrounds (red, orange, green, blue, teal, purple, and gray) and a plain background.

Also in the packet are clock numbers in the chevron backgrounds. I hot-glued these numbers to the edge of my classroom clock and love the 3D look of it! My thirdsters still struggle with analog time, so these will be a cute way to help them along :)

Check out this packet in my TpT Store HERE.

Table Numbers, Name Plates & Really Good Stuff Bin Cards:


I am using these bins from Really Good Stuff since I will have tables this year and I love them already! They are plenty big for folders, notebooks, and some books- I can't wait for the kids to use these!

This packet contains three items: Table Numbers (1-8), name plates with lines and the cards for the front of the RGS bins. I also like these cards for smaller labels around the classroom- I am going to use them to label their coat hooks.

These, too, come in all chevron colors: red, orange, green, blue, teal, purple and gray. There is also a plain background to the Table Numbers if you prefer to print them on color paper.

You can find this packet in my TpT Store HERE.

Guided Reading Level Labels for Bins & Books:

I am in love with these! I use GRL texts with my kids during Teacher Time and I will be using magazine boxes from Ikea to hold the books that will be labeled with the cute alphabet stickers for easy reference.
iPhone pic, sorry!

These are available in levels A-Z in alternating blue, red, green and purple colors with matching stickers. The stickers fit on the 30-per-page labels and you can see a preview in the TpT listing.

To pick up this packet, click HERE.

I think I am all chevroned-up! I love love love these accents and hope you can find them useful, too. Remember to pick up some of my free chevron items, too- Daily 5, CAFE, and Whole Brain Teaching Posters. And, there's a Welcome Banner, Cardinal & Ordinal Directions, and Binder Covers in the store, too :)

Enjoy!


Whole Brain Teaching-ish Rules :)


As many of you know, I use different rules in my classroom than the standard five from Whole Brain Teaching.

Their rules are:
  1. Follow directions quickly
  2. Raise your hand for permission to speak.
  3. Raise your hand for permission to leave your seat.
  4. Make smart choices.
  5. Keep your dear teacher happy.
These rules seem a-ok and I really like how they cover the spectrum of possibilities that students can throw in our direction!

However, I am head-over-heals in love with the class rules Ashley from The Polka Dot Patch created! These decorated my classroom last year and they were perfect! They worked seamlessly with our school's PBIS system and allowed me to incorporate WBT with no "conflicts of interest".

Here's how it looks in my classroom:


For her cute signs in pink and green, head over to her lovely blog HERE.

Quite a few of you have requested these rules to match my WBT Signs, and I am happy to say that, with Ashley's blessing, you can pick them up HERE on Google Docs for FREE!
I have called these "Whole Brain Teaching-ish Rules" and they coordinate with my other WBT Signs:
Click on the picture to download the poster set for FREE!

I have posted about how my class goes over rules HERE, but here's a quick recap of the gestures that go with the Whole Brain Teaching-ish Rules:

Rule #1: Listen (point to your ears) when your teacher (kids point to me) is talking (move hands together and apart like a mouth).

Rule #2: Follow directions quickly. (As we say this, we snap out fingers along with each word and say the rule quickly.)

Rule #3: Respect others (point out), respect yourself (point to yourself), and respect your school (point to the ground).

Rule #4: Raise your hand (raise your right hand) to speak (make moving mouth motion) or stand use index and middle finger to 'walk').

Rule #5: Be safe (hug yourself), be kind (cover your heart with both hands), be honest (place right hand up, like you were about to testify). 

I have the kids practice these each morning before we begin our Morning Meeting. I used to lead it, but I now leave that up to the Morning Meeting Leader and I do it along with them.

I hope this helps you on your WBT journey and thanks to Ashley for your awesome rules!


WBT & The Super Improver Wall

One of my most favorite parts of the Whole Brain Teaching Conference was learning about the Super Improver Wall.

The idea stems from The Super Improver Story:
Two students have a foot race. The faster student wins and she gets an "A" from the teacher. The slower student loses and gets an "F". Every day, they have the same race. Every day, the result is the same. After a while, the fast student loafs and the slow student quits. Of course! The grading system is unfair and doesn't motivate either kid! The teacher creates a new race. Now, the fast student only gets an "A" when she beats her previous best time. Same with the slow student. Now, each student always runs as hard as possible!
Moral: The only fair race is the one you run against yourself.

What is the Super Improver Wall?

It is a way of motivating students to improve from wherever they are- it's self-differentiating, which is great!!

Watch this wonderful video from Chris Biffle that describes it all:


Here are some examples from the WBT Midwest Conference:
sports theme
animal theme
universe/space theme
I know it looks like there are lots of pieces and parts, but it makes a ton of sense, promise :)

On the left, you will notice the hierarchy that all kids will move up during the year- starting with Rookie and then (maybe) hitting Living Legend by May or June.

Each level is represented by a different color and they get more complex in size and color as you get near the top (Living Legend can be gold, glittery, larger, etc.- it's a really big deal!)

The Student cards on the right are a bulletin board display with each child's name displayed. The students start the year on white (Rookie) and their name color changes as they receive stars.

10 Stars= Go up one level

How does a student receive a star?


Any time they improve on something! This can be an academic focus, a behavior focus, anything that they did better than before.

I really like this focus- in the past, I have rewarded kids based on good behavior- basically, doing what they ought to be doing by following the rules, working quietly during work time, etc. This was easy for my well-behaved kids and hard for my rule-benders and there wasn't the desire to improve like this wall.

With the Super Improver Wall, kids are always striving to do better- yay! This could be improving their score on a spelling test, mastering a multiplication level, remembering to raise their hand twice that day to participate, etc.

When they show improvement, they receive a star on their name card. This can be as simple as a hand-drawn star by the teacher or an actual star sticker- up to you, but keep it simple :)

Because there are 10 levels and 10 stars equal 1 level, that's 100 stars over the course of the year, so a child could receive no more than 2 stars a day. In reality, they shouldn't receive more than one star a day, otherwise they will hit Living Legend in December..... eeek! I think that with the focus on improvement, though, that will be doable.

Worried about your higher kids that always do well on everything? Have them set their goals for improvement- this discussion will be a great way to help them rise to new challenges, which is sometimes a struggle to always think up on your own :)


What does the Bulletin Board look like during the year?

Because kids are in different spots at different times, it will be a hodge-podge of colors and stars. Here are some examples from Chris Rekstad's (WBT guru) classroom:
Early in the year: notice the hierarchy is on the left and the variety of background colors
Later in the year: the kids around the border are "Living Legends" and have their picture taken (ooo!) and get fancy gold paper backgrounds (aaah!). Kids of ALL skill levels are Living Legends (yay!!)

In this example, their stars are located on index cards with their names on their desks to make it easy for the teacher to walk around and draw a star when he sees improvement. That management technique seemed nice to me, since I don't want to be running back over to the board all of the time and probably couldn't reach the top of my board without standing on a chair!

What do you think of the Super Improver Wall?

This was a pretty short intro, but what are your thoughts? Rewarding for improvement instead of expected behavior, having kids motivated to do better, easy-peasy rewards for me to manage (colored paper and hand-drawn stars= no problem!), and having kids at ALL skill levels reach the highest "Living Legend" were the pieces that really got me excited :)

Have you ever used the Super Improver Wall? Do you have examples? Leave your experience in a comment below and we can all learn from you! 

I'll be completely honest- I am still loving my Clip Chart, so I am not sure how I will incorporate this idea this year. So many good ideas out there!!!

Making Mini-Notebooks

Have you seen the idea on Pinterest to go to a home improvement store to cut your composition notebooks in half, thereby making two mini-notebooks?

I love Home Depot and the like,  but I just couldn't imagine those huge saws cutting though my 50 cent composition notebooks and making them look nice.

Then, Monica at The Schroeder Page wrote about her trip to an office supply store and their print department and I knew that was the solution to my problem!
From 15 of these big guys...
To 30 of these little guys!
I am so so so excited!

At my local Office Max, it was around $1 a cut, and they said thy could cut 500 pages in one cut- so it would only be a little over $3.

Then, the lady was kind enough to cut them one by one to make sure they were all even (she knows me too well!).Yaaay!!!

I plan on using these for my Math Message at the beginning of math class, so these will be PERFECT! Plus, it costs around $10 for 30 mini-notebooks!

Hello little lovelies! Math is color-coded yellow- I'll have to tell you all about my color-coding system soon :)
Can you think of any other uses for these? Now that I have one set, I want more! :)

I hope you are all enjoying the last few weeks of summer!


I Heart Mystery Readers


I am always looking to authentically involve parents in my classroom and I am happy to say that this next activity fits the bill!

Mystery Readers

Have you used Mystery Readers before? The idea is not new, but the best part is that it gets parents into the classroom, involves kids and exposes everyone (even the teacher!) to new and wonderful picture books :)

I have used Mystery Readers for the last three years and can honestly say it is the highlight of our week! Each Friday, I have a parent, grandparent, older sibling, neighbor, anyone (even other teachers and the principal!) come in to share their favorite picture book. They read it aloud to the class and we all get the chance to enjoy a read aloud- don't you just love being read to? Never gets old :)

Best part? Up until the reader walks into the room, it is a total mystery to the students who will be arriving- yay!! The suspense + the big reveal + a read aloud by a guest = happy parents, students & teacher- WIN!

Mystery Reader Set-Up


1.The first week home, I send an intro letter to the parents so they know all about Mystery Readers and what it entails. This describes who can be a reader, what to read, and the importance of keeping the secret :)

2. Then, a few days later during Back to School Night, I pass around a calendar with the times I have set aside for the whole year so parents can sign up. I have this available throughout the year, so parents can add/change their time if they need to. I continue to stress the importance of keeping this a secret- that's the best part!
 3. A week before a reader's scheduled time, I send home a reminder letter (in an envelope or email) of their date and time and I ask them for two things: the name of the picture book they will be reading (for my own knowledge, just so everyone doesn't read The Giving Tree all year!) and five clues about themselves.
4. These clues are very important and will be read before the Mystery Reader is introduced, building suspense and making the big reveal so so so much fun :)

I recommend the parents use clues like:
  • where they were born
  • their favorite sports
  • their favorite book when they were in 3rd grade
  • a fun fact 
  • not who their child is in class :)
These clues are then put into an envelope that is labeled and hung in the front of our class.

5. I read the clues aloud as our class door is closed with our Mystery Reader waiting outside. The kiddo usually always knows it's their parent by the end and it's so so cute :) I then open the door for the big reveal and have the child introduce their parent (or sibling, grandparent, whomever). If it's the principal or another staff member, I have a volunteer introduce them to the group (it's nice to practice that skill!).

They sit at our Author's Chair and share their book. It's awesome :)

When they are done, we will borrow the book for a week (or I will pull my copy) and we will display it in our class for later reading (during Read with Someone or DEAR time)
6. Later in the day, we write thank you notes to our reader and I send them home with their student. They are short and sweet, but a nice way to thank them for coming in to share with our class.
All of these pieces and parts are available now in my TpT Store.

Enjoy this meaningful and high-interest activity with your students and families this year!


Keeping Kids Accountable During Daily 5


I love using the Daily 5 in my class! If you want to see how I use it, check out my Daily 5 Series HERE.

One thing I struggled with was accountability. I needed kids to know that I wanted to see their work-- not to gather it, collect it, and grade it each and every time causing more work for me-- but that I wanted to check in with them and make sure they were on the right track and not just playing on white boards during Word Work or chatting with their friends during Read to Self.

I tried several approaches last year and finally settled on something that:
  • didn't create tons of extra work for me
  • didn't take away time from the kids to fill out/complete
  • lasted for more than a week (this one lasted three weeks with my schedule last year)
  • kept them accountable
  • worked for kids on all levels
  • gave them choices
Here's an older version of my Daily 5 Booklet:

I use the large 11x17" paper with Word Work Bingo on the cover and the Read to Self Menu in the center and it works very well for the three weeks we use it :)

Here's a breakdown of the pages:

Word Work Bingo

This menu gives kids choice and allows me to check their work without lots of additional grading. When kids first receive this packet, they need to decide what Bingo they are going to make. Then, over the course of the next three weeks, they work on the activities and receive my signature in the box after they complete the work.


You can find a fully editable version of this HERE for use in your own classroom.

Each Word Work session equals one square. My sessions are only about 20 minutes, so it's not too long. If they do get done early, they can work on additional vocabulary words from the book we are reading as a group.

For more about Word Work in my class, click HERE.

To purchase some of the Word Work activities listed on the board, visit my TpT Store HERE.

Read to Self Menu

I love this because it gives kids tons of options and allows me to grade their work on a variety of skills and on any book. Yay!

Remember, my kids had three weeks to complete this, so each week they had 2 Read to Self times. This menu was the result of 6 Read to Self times and I told them I would be grading accordingly-- each section needed their best work shown. These two pages are the only two I could grade from the packet. This menu gave me great insight into the teaching points I needed to work on with a student and some evidence for where they were growing.

Each student was responsible for all three sections of a menu- appetizer, main course, and dessert. At the beginning of the year, I would instruct them to complete the "Appetizer" section on the first week, the "Main Course" section the next, and so on. Those explicit directions stopped as the year continued and kids built more independence. Toward the end of the year, it was not unusual to see some kids working on dessert first, other starting at the main course, and some jumping all around. I was a-ok with any of it, as long as it was their best work and all complete after three weeks.

Have you ever tried a menu before? I LOVE it! It's like Bingo, but so much more fun, especially if you love food as much as I do ;) This menu includes work on connections, summarizing, connections, characters, visualizing, and more!


Would you like a copy of my these menus? They are available in my TpT Store and there is a different menu for each month, spirling practice throughout the school year! Find them for 2nd, 3rd, and 4th grade HERE.

Disclaimer: The Daily 5 & CAFE resources are unofficial adaptations of the Daily 5 by Gail Boushey & Joan Moser. This freebie is not endorsed by the 2 Sisters. http://www.thedailycafe.com

How do you keep kids accountable during Daily 5? I'd love to hear about your ideas- leave me a comment below :)


Getting Started with Whole Brain Teaching: The Core 4

It's so exciting to hear that so many of you are going to be trying Whole Brain Teaching this year!

I know I am not alone in saying this, but when you do, you will love it and want to try more and more from this great program :) If you want to read all of my posts about it, you can by clicking HERE.

Having received a lot of questions about how to start using WBT in your classroom, I want to share with you the top four principles of WBT, also known as the "Core 4".

The Core 4

The Core 4 are, simply put, the four main things you can incorporate into your class to implement Whole Brain Teaching quickly, effectively, and with immediate results each and every day.

They are:
  1. Class-Yes
  2. The Scoreboard
  3. Mirror
  4. Teach-Okay
They are meant to:
  1. Bring the class together (Class-Yes)
  2. Keep them motivated (Scoreboard)
  3. Get them active (Mirror)
  4. Build community and be accountable for their learning (Teach-Okay)


Class-Yes

This is a wonderful call & response management technique that I am sure you have used in the past using  different words, but with the same premise.

As the teacher, I say, "Class?" and my students stop what they are doing, fold their hands and look at me, giving me their undivided attention, but not before replying, "Yes!". They key is they say "Yes!" in the exact same voice/style that I said "Class?".

This can include, but is not limited to:
  • whisper
  • robot
  • singing voice
  • "Classity Class- Yessity Yes"
  • "Classadoodle Doo- Yesadoodle Doo"
  • "Ohhh Class? Ohh Yes!"
  • and TONS more!

I have posted more about this HERE, so head over for some additional ideas as well as a helpful video!


The Scoreboard

[source]

While Class-Yes is a quick and fantastic way to get the class together, there needs to be some motivation to ensure that this is done super quick and you aren't having to call out Class-Yes more than two to three times to get their attention.

This is where the Scoreboard comes in VERY HANDY!

The setup is simple- a T-chart with a smiley on one side and a frown on the other. As you use Class-Yes, you reward kids with a smiley or a frown for how well they came back together. The celebrations or moans are quick in response to the point on either side of the chart.

The key to keep up motivation is to keep the tallies within three points! This will ensure that kids are still trying to get the goodie at the end of the day (which is a fun Brain Break, a free minute of music playing, packing up one minute early, one extra minute of recess.... you get the idea!)

I have posted more about the Scoreboard HERE.

~~~~~~~~~~~~~~~~~~~~~~~~~~~~~~~~~~~~~~~~~~~~~~~~~~~~~~

Disclaimer: The third and fourth part of the Core 4 are meant for use during your teaching. Don't feel the need to do all of these on the very first day! As with everything, do what you are comfortable doing. It took me a while to use Mirror and Teach-Okay. I used Class-Yes and the Scoreboard for weeks before I felt confident enough to introduce them!!!


Mirror

Now that I am more confident with Whole Brain Teaching, I am LOVING the Mirror!! I admit, when I first started, I was not doing so well because it was hard for me to think of gestures to teach concepts.

BUT, that changed when I started getting into the flow of WBT and there were times I even had the kids help!

Mirror allows the kids to repeat your gestures as if they are your mirror as you teach a new concept. You teach a little with gestures, they gesture along with you. One thing to remember- mirrors don't talk!- so the focus is on your motor & visual cortexes and linking movement to their learning.

If you do want your kids to repeat words and gestures, you would say "Mirror Words" and this time, kids would repeat what you said and your movements. This engages their motor and visual cortex as well as their Broca's and Wernicke's Areas.

The gesture for mirror is holding up both hands, palms facing out and saying "Mirror". The kids repeat only using their hands, palms out. If you are using Mirror Words, you say "Mirror Words" and have one hand up and the other hand start at your mouth and them go to the regular Mirror position.


Teach-Okay!

How many of you have used Turn & Talk? This is similar, but instead of always using open-ended prompts, students are repeating the gestures and the teaching points to their partners. One will speak first while they both use gestures, then two will talk while they both use gestures, and this will continue until you call them back with Class-Yes.

As the lesson continues, there will be times they will need to explain their thinking with examples use the word "because", but it's important that both students are taking turns talking and always gesturing during this time. 

The gestures for starting Teach-Ok is clapping and saying "Teach" while the students clap and reply "Okay". Just as you did with Class-Yes, mix it up to keep it fresh & fun!!

Putting It All Together


Remember this WONDERFUL video? It's what got me hooked on WBT :) Watch it again for the Core 4 (Class-Yes, Scoreboard, Mirror & Teach-Okay) and think about how you would incorporate them into your class this year.


Don't you just LOVE WBT in action? And, I totally would LOVE to have this teacher, she's amazing!!


As I stated above, it took me WEEKS to feel confident enough to incorporate all of these steps into my classroom, so don't feel you have to do even the Core 4 from the very beginning. I started with Class-Yes and the Scoreboard and went from there.

The best part is that the kids are engaged, you are all having fun, and as a teacher, you are in Teacher Heaven :)

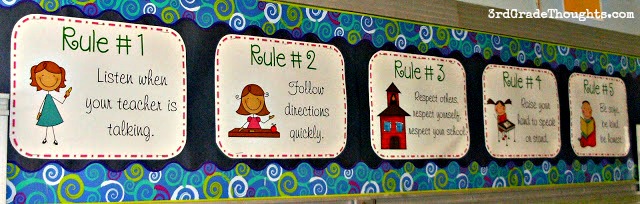
If you are interested in my WBT Signs, you can find them in my TpT Store for free! They also match a set of WBT Classroom Rules.
Let me know if you have any questions! As always, remember to check out the Whole Brain Teaching website for TONS of free information: http://www.wholebrainteaching.com/

I look forward to reading about your experiences with Whole Brain Teaching :)


Teaching & The Brain (With Gestures!)

One of the items I loved best from the Whole Brain Teaching Conference was learning all about the brain and how its different parts impact learning.
[source]

As teachers, we all know that all kids learn differently and need lots of interactions with materials outside of up just saying something once. We use repetition, lots of examples and modeling, tapping into multiples intelligences, incorporating movement & gestures, and checking for understanding to make sure our students understand each new concept.

Actually naming and describing the different parts of the brain incorporated in Whole Brain Teaching helps not only me to understand it better, but will be a great way to introduce this to admin, other teachers, parents, and even kids!

Here we go!


Parts of the Brain


1. First, clasp your hands together in front of you with your fingers interlacing:
I'll call this "Brain Position" during this explanation to help.
Explain to the kids that this is your brain and is very similar in size to your actual brain.

2. With hands in this Brain Position, wave your pinkies- this area of your brain is the prefrontal cortex. Have kids point to their forehead and explain the prefrontal cortex is the boss of the brain (gesture: put hands on hips), in charge of planning complex cognitive behavior, personality expression, decision making and moderating social behavior. [source]

3. With hands back in Brain Position, wave your middle fingers- this area is the motor cortex responsible for voluntary movement (gesture: move your arms side to side like you are running).

4. With hands back in Brain Position, wiggle your thumbs- this area is the visual cortex responsible for processing visual information (gesture: point to your eyes).

5. Now, you will be separating your "brain" into left and right hemisphere- have the kids say "ew!" as you move your hands apart, keeping fingers bent toward your palm. You could use this opportunity to describe some of the differences between the left & right hemisphere:
[source]
We will be looking at the left hand (left hemisphere) for the next few areas.

[source]
6. Point to the outside left pinkie knuckle- this is the Broca's Area responsible for language production.(gesture: make talking gesture with hand).

7. Point to the outside left middle finger knuckle- this is the Wernicke's Area responsible for understanding written & spoken language (gesture: point to temple, pretend to write and make talking gesture).

[source]
8. Make the "Brain Position" with your hands, separate them into left & right hemispheres (say "ew!") and point to the palms of each hand- this is the Limbic System. This system houses several smaller parts of the brain and is responsible for emotion, behavior & long-term memory [source]. (gesture: for emotion, make a roller coaster movement with your hand, going up & down; for long-term memory, point to your temple).


How Does This All Tie Together?


Traditional Teaching relies upon the student's Wernicke's Area to understand information that is delivered primarily by the teacher talking.

Whole Brain Teaching and Brain Based Teaching relies upon all of the other parts mentioned above to teach and involve students in learning, including:
  • Prefrontal Cortex- used to make decisions about adding "because", giving examples, being in charge of their learning
  • Motor Cortex- moving & gesturing to learn and practice a concept
  • Visual Cortex- posting purposeful signs in class, watching our partners gesture when we "Teach!" to help us see it as well as practice it
  • Broca's Area- teaching our partner, using our words to think critically (using "because", giving examples), mirroring with words
  • Wernicke's Area- still being used, but now in conjuction with sooooo much more of the brain!
  • Limbic System- all of this ties together and allows us all to have fun while learning! This angages our limbic system which makes it fun and ties it to our ling-term memory- yay!
Practice using the gestures and going through the different parts and what they are responsible for- I hope you find this as interesting as I do!

It gets pretty quick & easy to explain, so I may even try to throw this in during Back to School Night with parents. This would give them an example of a WBT-style lesson as well as a fun explanation for why our class may look and sound differently than years past!